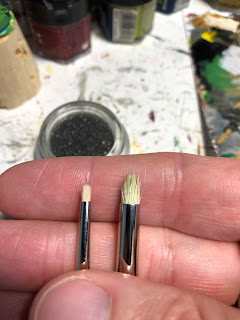
"Drybrushes, really?" I hear you say...Yep, drybrushes. It's a technique that I've recently been intrigued by, and I have a desire to get better at. The big mystery has always been "how do you dry brush without resulting in that 'chalky' finish?"
Now, I don't think a set of fancy drybrushes is going to be the magic solution. I simply don't like any of the drybushes on the market (GW, Army Painter, etc.). But with the release of the Series D brushes, Artis Opus also filmed a bunch of videos that walked through how to use the new brushes and better techniques to get really good results with drybrushing.
Here's the size 0 and size 1 brushes - in the background you can see the really nice "sponge" that came with it to enable you to "dampen" the brush (more later). it also came with brush soap cleaner, a nice box and i got the upgrade MDF brush rack.
So, I'm currently working on speed-painting the plastic figs that come with the 2nd edition Blood Bowl set. I figured, that's a perfect time to do a trial run with these brushes and learn some new techniques.
Here's some pictures of the stages. It's exactly every little stage, but it's most of them. What seemed to be the key "idea" is to dip the tip of the brush into a damp sponge throughout the drybrushing (I know that seems counterintuitive). As I got started, my initial reaction was "huh...that really works!". The other trick is to build up the colors with more gradual layers and really take your time. As soon as you rush it, the highlighting looks to stark and the chalkiness starts to happen. But that little dip of the brush into the damp sponge seems to be key.
First, base coat the main green color (GW Warpstone Glow).
Then apply the first layer of drybrushing. GW Warpstone Glow plus GW Warboss Green (similar to old goblin green).
Then second layer to blend it GW Warboss Green.
Third layer was GW Warboss Green + GW Skarsnik Green.
Fourth layer was GW Skarsnik Green to accentuate the highlight.
Then, to blend it down and reduce the harshness of the drybrushing, I hit it with a wash of Biel Tan green.
After that, another light layer of GW Skarsnik Green to bring up the highlights again (no picture).
the final step is the magic step for my greenskin flesh - a thinned layer of GW Lamenters Yellow Glaze. It slightly tints the color but gives that unified "pop" that i like.
And here's the finished product. I did not use any brushing on the remaining parts (i experimented with the red, but I kept getting the red paint on the green flesh so i want standard layering approach).
I'm pretty pleased with the results and my commitment to "speed". I didn't worry about fixing mistakes unless they were really obvious, barely worried about mold lines, and didn't to much highlighting. I only highlighted the red uniforms and the black straps/gloves/boots. The other stuff i just hit with a thin brown or black ink and called it done.
I'm treating these as 'game pieces' to enable us to play games of blood bowl. that's it! i'll dedicate my time and energy on better models that are on the tabletop.
This morning I finished the last lineman and two blockers. Only the two Black Orcs remain!
After that, the Human Team and then finally i'll get to properly paint my Dark Elf team (which will NOT be speed painted!)


