My cousin returned for a weekend of wargaming. We started with a 40k battle of old foes: my Imperial Guard vs his Blood Angels. 1200 Point battle.
The Blood Angles Army List
Command HQ: Dante 225pts
Troops: 5 Sanguinary Guard with company banner, power fist, Infernus melta pistol 250pts
Elites: Chaplain 125pts
Troops: 5 Death Company w/ jump packs, thunder hammer, hand flamer, 215pts
Troops: 5 Assault Squad w/ sergeant with plasma pistol, flamer, melta bombs 125pts
Fast Attack: Ba'al Predator 150pts
Heavy Support: Whirlwind tank 90pts
Total: 1195
For the Imperial Guard army list, I'm just going to list basic information otherwise I'll be typing for a few pages...
The Imperial Guard Cadian Army List
Command HQ: Command Company HQ 100pts. Lt. with Power Weapon, Vox, Regimental Standard, Veteran Lascannon team.
Mounted in Chimera with heavy flamer, dozer blade, hull mounted flamer, pintle mounted Storm Bolter 75pts
Elites: 7 Ratling Snipers 70pts
Troops: Infantry Platoon
-Platoon Command Squad with power fist, 2 meltas, lascannon team 85pts
-Squad Abel 10 guardsmen w/grenade launcher, vox, missile launcher team 75pts
-Squad Bravo 10 guardsmen w/grenade launcher, vox, missile launcher team 75pts
-Squad Charlie 10 guardsmen w/flamer, vox, missile launcher team 75pts
-Squad Delta 10 guardsmen w/flamer, vox, autocannon team 70pts
-Squad Echo 10 guardsmen w/lascannon team 70pts
-Special Weapons Squad 6 guardsmen w/3 plasma guns 80pts
Heavy Support: Leman Russ with hull mounted lascannon 165pts
Heavy Support: Leman Russ with hull mounted lascannon, side sponson heavy bolters 185pts
Total: 1125
We played the "Big Guns Never Tire" mission. Heavy Support teams were the scoring units, diagonal deployment zone. 4 objectives on the battlefield, 3 VPs each. 1 VP for first player to destroy an enemy unit, and 1 VP for each heavy support destroyed, "Linebreaker" victory condition: 1 VP if scoring unit in enemy deployment zone.
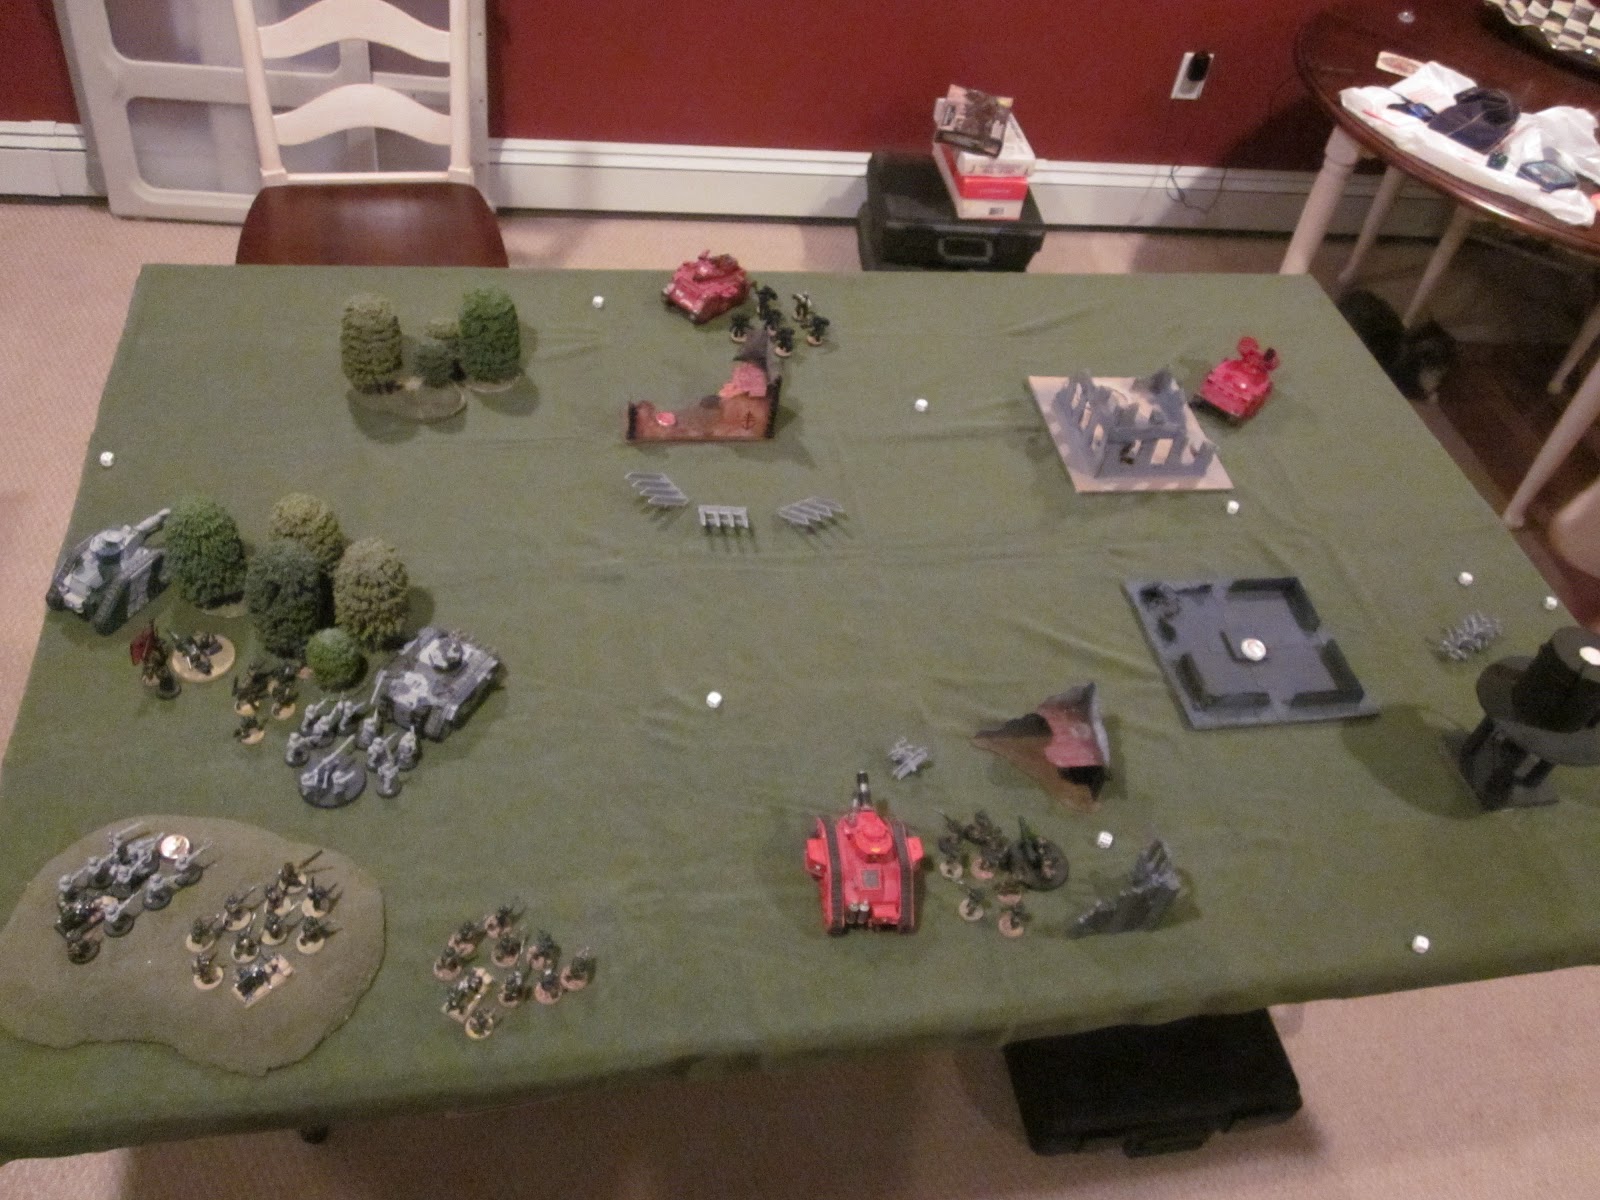
Here's a shot of the terrain setup and the deployment zone, with objective markers noted. Objectives are numbered clockwise beginning from bottom left, 1 (on the hill), 2 (in the woods), 3 (in center ruins), 4 (in far right ruins).
Here's a couple shots after we deployed.
As you can see above, the Blood Angles only deployed the Predator, Whirlwind, and Death Company. The rest were held in reserves (with their very accurate deep strike ability).
After all the units had deployed, the Ratlings infiltrated into the woods on the IG left flank to claim the objective.
Imperial Guard won the initiative and deferred giving the Blood Angles the first turn.
Turn 1 Blood Angels:
Ba'al Predator got a scout move, moved up the flank towards the objective that the Ratlings were holding.
 |
| Final moments... |
Death Company followed in support. Then the Predator fired the Flamestorm Cannon, unleashing ridiculous amounts of heavy flame into the woods and burning 5 of the 7 Ratlines to a crisp. The remaining 2 Ratlings promptly failed their panic check and ran off the board. My cousin summed it up perfectly: "So that's that."
 |
| "So that's that." |
The Whirlwind on the far right corner launched a barrage that hit the Chimera, but the shots pinged harmlessly off the armor.
Turn 1 Imperial Guard:
The Imperial Guard began executing their battle plan, ignoring the objective on their right flank and concentrating on the 3 objectives on the left flank of the board. With the platoon squad mounted inside, the chimera surged forward towards the tank traps, Death Company, and Objective 3. Infantry Squad Delta followed the Chimera's lead, moving around the right side of the Ratling wood and Objective 2 with the Specialist squad full of plasma guns right behind them.
The Leman Russ without the sponsons moved up the left flank around the woods to deal with the advancing Predator, with the Company Command Squad following behind.
 |
| Your days are numbered... |
It was time for the Big Guns to open fire. First the lascannon in Squad Echo drew a bead on the Predator which happened to present it's side armor. The beam of light sliced right through the weak armor and hit the fuel tanks blowing the Predator to pieces. Having lost it's main target, the Leman Russ next to Squad Echo turn it's Battle Cannon on the Whirlwind, shaking the crew for a turn. The missile launcher team in Squad Charlie found the Death Company Chaplain as their only target and hit him directly, but a last minute Look Out Sir saved his bacon. It was a tough turn for the Blood Angels; a foreshadowing of things to come.
Turn 2 Blood Angels:
The orbital link between the Chaplain and the Reserves was blocked by interference and the Reserves did not appear this turn. The Chaplain lead the Death Company in a charge against the Chimera. It didn't take long for the Death Company to rip open the Chimera and cause it to blow up. The Platoon Command Squad inside the Chimera tried to escape and only the two meltaguns and the Commissar managed to survive.
The Whirlwind crew managed to clear the cobwebs from the Battle Cannon shot the previous turn, but missed their target.
Turn 2 Imperial Guard:
The Leman Russ on the left flank moved around the woods to get into position for the Death Company.
The Special Weapons Squad ran forward with their plasma guns to save the Commissar. With a brief hum, the supercharged plasma guns flashed and hit the Death Company, killing all of them including the Chaplain.
 |
| I swear there were Space Marines a second ago... |
 |
| Battlefield after Turn 2 |
Turn 3 Blood Angels:
The comm-link was re-established and the units in reserve arrived this turn. The Assault Marines landed on the other side of the ruins near Squad Echo on the IG right flank, while Dante and the Sanguinary Guard appeared directly behind the Leman Russ near the Ratling Woods and Objective 2.
 |
| Assault Marines preparing to hit the Imperial Guard flank |
 |
| Dante and his Sanguinary Guard about to wreak havoc |
The Whirlwind takes another shot on Squad Delta and killed one guardsman.
Dante, the master of taking out vehicles, hit the unprotected rear of the Leman Russ with his Infernus meltapistol, the explosion flinging super-heated shards of metal everywhere.
Turn 3 Imperial Guard:
The Imperial Guard Company Commanding Officer realized that his time on this ugly rock was probably numbered and issued orders to Squad Delta destroy the Whirlwind and "Bring it Down!". The Autocannon team in Squad Delta heard the orders loud and clear, knowing that they needed to eliminate any heavy support that the Marines had. The autocannon ripped into the Whirlwind and destroyed it. Squad Echo held their nerve just long enough to take a shot with the lascannon and killed one of the newly arrived Assault Marines.

Up on the hill with Objective 1, the missile spotter realized he had a great shot on Commander Dante. With a tap on the triggerman's head, the missile screamed across the battlefield and scored a direct hit on Dante. His ward save and another "Look Out Sir!" was not enough to handle the power of the missile, killing him instantly. With a roar of triumph, the Special Weapons team knew they had a chance to end the fight right here. They advanced towards the remaining Sanguinary Guard (normally a suicide mission) and let loose 9 shots of super-heated plasma gas. Confused by the death of their leader, the Sanguinary Guard were not expecting to get hit by that much plasma. 4 of them died, with the battle standard bearer the only one remaining.
The remaining Sanguinary Guard knew the fight was lost and radioed the Assault Marines moments before they were going to charge. The order to retreat was given and the Blood Angels conceded the fight to the Imperial Guard.
Imperial Guard victory!
 |
| A stunning, unexpected victory for IG! |