Showing posts with label wargaming. Show all posts

Saturday, January 2, 2021

Chaos vs Dwarfs Remote Gaming

 Played first remote wargame a few days ago and it worked surprisingly well. It was myself as the Dwarf player vs Joshua, of Crown of Command Podcast fame, remotely commanding my newly painted Khorne Chaos army.  We used Google Meet and I attached my iPhone on a stand. Connected a Beats Pill bluetooth speaker to hear the remote player (Joshua) better. 

Joshua is very small in the iphone

14 hour time difference was no problem.  It definitely helped that it was a a small game (1500 points), we used no magic, and had the right attitude. 

Chaos vs Dwarfs, Warhammer Fantasy Battle (WHFB) 4th edition. 

Deployment:

Overhead Deployment

You can see in the above picture the Chaos deployment (left side of picture) with a "Refused flank", to try and take the flame cannon out of the game, as well as the hammerers (the block of Dwarfs on dwarf right flank). 

Dwarf Army

Chaos Army


This isn't a turn by turn battle - we didn't have pictures of the first two turns because I had forgotten to charge the batteries of the "fancy" camera and since the iPhone was hosting the video, I couldn't snap any! Better planning next time.  

Dwarfs had initiative and went first.  Unloaded all 5 barrels of the organ gun, didn't misfire! This decimated the beastmen unit. 

The Khorne Chaos lord on the Griffon flew forward (did NOT fly high), and used his "breath fire" chaos gift, blasting the crew of the organ gun and leaving 1 crewmen remaining.  This proved critical because it meant it would take an extra turn to "reload" the organ gun. (We'll return to that later).

The the most part, the Dwarf shooting was pretty effective.  The flame cannon tried a few ridiculous attempts to shoot the flames over friendly units, and didn't get there, killing Dwarfs instead.

After neutralizing the organ gun, the chaos lord charged the dwarf crossbows, who opted to flee as their charge reaction and which forced the griffon to have a failed charge and get stuck right in front of the organ gun.  When the Dwarfs were about to unload all 5 barrels again, we realized that with only 1 crew remaining, the organ gun would need another turn to reload, so...that didn't work out. It left the organ gun a sitting duck for the ogres (who were on the extreme flank).


The chaos warriors were slowly making there way around the rocks that were in the middle of the table. 


Eventually, the chaos lord slammed into the crossbows, but you can see that the main dwarf clansmen unit had repositioned themselves (with their general) to either help this fight or take on the chaos warriors.
The ogres charged the organ gun, and to everyone's surprise no wounds were caused on either wide, and the lone crewmen won the combat because of the +1 higher ground bonus! we were on edge as Josh rolled the break check...and he barely passed!  Either way, the crewman had done his job.  He tied up the ogres in combat for two turns, basically taking them out of the game.


This picture above was when I realized I made a mistake by letting those final two members of the beastmen unit survive.  I thought they were harmless, but the champ was actually a chaos champion of Khorne (not a beastman champ), and he had frenzy, and something else, and basically when the hammerers failed to break them on the first turn with rank bonus and standard bonus, the champion and beastman standard bearer tore through this unit of hammerers.  It was brutal!

You can see the unit of 6 Dwarf slayers moving across the rear of the dwarf line in a "snake" formation.  Pretty sure that's the first time in my life that I ever moved Dwarfs in a snake. 


You can see above, this is this misguided attempt by the flame cannon crew to shoot the flame over their own units...and hitting the Dwarf General's unit of clansmen instead.


The Slayers got into position, waiting for the eventual destruction of the crossbowmen.  That set up a great combat with the griffon and chaos lord against the slayers.  Well, great because the slayers actually got into combat with a monster.  But they got slaughtered and met a proper "doom".

This set up a final last chance gambit by the Dwarf General and his unit of clansmen.  The charged the chaos warriors, hoping to break them.  They didn't.  The chaos warriors won and broke the unit.  

That was the end of Turn 5 and the final turn. The forces of chaos handily defeated the dwarf army.

All-in-all, it was a great battle.  Lots of fun to play some solid "herohammer" which had wild swings of momentum and general ridiculousness.  I know that 4th and 5th ed get a lot of complaints, but the rules as written hadn't accumulated any of the "cruft" of the later editions.  Sure, there's some ambiguity and grey areas here and there, but the spirit of the game is pretty light and fun.  It wasn't "serious" yet. Which is why it was, and still is, my favorite edition of WHFB. 

Thanks to Joshua for staying up late and playing as the "remote" general!


Monday, July 6, 2020

Gorfang's Last Chance

Here's a quick recap of the third and final chapter of Gorfang Rotgut's attempt to capture Nuln.

The previous battle ended with the Empire barely holding off the orcs on the outskirts of Nuln which bought enough time for Elector Countess Emmanuelle von Liebwitz to muster up enough of the town defenses and get the famous "guns of Nuln" onto the city wall before the rest of Waaagh Gorfang crash into the city. 

The new Baron, young Edwin, son of Edwin "The Absent", led the forces in that skirmish but lost his nerve during the combat and quit the field early.  Countess Emmanuelle is giving him one more chance to restore honor to himself and to the family name as he leads the forces of the Empire against the Orcs and Goblins.

Here's the initial deployment. Lots of artillery lining the city walls.  Note the foot and mounted units of Reiksguard on the left - double Reiksguard!


At the start of the game after the greenskins moved up the Helbaster volley gun malfunctioned in glorious fashion on the first shot, exploding and completely mowing down the river trolls before disintegrating.

As Fred the giant advanced through the pastures of the farm, he charged the unit of halberdiers and the routed off the board.  Seeing that his right flanks was sorely threatened by the Giant, Edwin attempted to avenge his father’s untimely death at the hands of Fred and so he charged him (also trying to improve his reputation after retreating from the field of battle in the last engagement)

Neither Fred nor Edwin did any damage, but Gorfang used the opportunity to charge in with his chariot, killing the new Baron Edwin!

The wizard used a transport spell to move the Knights Panther across the battlefield straight into combat with the Night Goblin spearmen unit, The Flaggers.  They were so startled as the knights suddenly charged them out of nowhere that they didn't have time to throw out the fanatics until after the charge happened.  Incredibly, both fanatics annihilated the entire unit of Knights Panther. 


Grom the Paunch made a surprise appearance and tried to be a hero (and eventually take over the Waaagh if/when Gorfang inevitably failed) and charged the rear of the unsuspecting Reiksguard on foot. Taken completely unawares, they routed and Grom ran them all down, barely stopping before running into the large orc mob The Reds.


Grom the paunch surprise rear attack hits home


Things were looking bleak for the Empire, but after watching both Lord Edwin and their foot counterparts get run down by chariots, the mounted Reiksguard decided to try and defend the honor of the Reiskguard order and charged into the flank of The Reds.  The orc mob was not prepared at all for this with their attention focused on the carnage in front of them caused by Grom.  The Knights killed 5 orcs on the charge, the orcs broke and fled from this flank attack, and the Knights ran them down! Skullface and Oglok the 'Orrible manage to escape, but the Flaggers night goblins failed their panic check, and this was enough for Grom to decide that discretion was the better part of “hero of the day”, and fled the field to let Gorfang take all the blame for this debacle.

Against all odds, the Empire forces under young Lord Edwin had repelled the last gasp of Gorfang’s Waaagh and saved Nuln from an imminent sacking.  Edwin, even in death, successfully "led" the Empire forces and was given credit for defeating and dispersing Waaagh Gorfang and saving Nuln, restoring honor to himself and family by avenging his father's death.  Over the years "Baron Edwin" becomes an honorific title, assumed by whomever in the family takes over as the new Baron of Lietziger, along with the family heirloom Dragon Blade. 

Saturday, June 13, 2020

Waaagh Gorfang

I've added this to the campaign characters page, but this post includes some additional units that make up Gorfang's Waaagh as part of the Warpstone Conflict.


Gorfang's High Command

Gorfang Rotgut: Famous (or infamous?) Orc Chieftan of Orcs of Black Crag.  Gorfang is in his later years but still manages to bring together various tribes for medium-sized Waaaghs.  His current Waaagh came together when he basically noticed an enterprising Night Goblin Boss named Skragg, and basically just took over.  

Barrzug the Satisfied:  Barrzug is a very power orc shaman that sometimes aids Gorfang.  He tends to hang back on his mighty wyvern, Crakat, blasting foes from afar, content to let the annoying night goblins do the dirty work. 


Skullface: Brutal Black Orc that is Gorfang's main underboss.  Skullface is too out of control to lead his own tribe so instead he hangs around with Gorfang because Gorfang always finds a way to enter a good scrap.  And if any of the upstart Night Goblins get a little too mouthy, Skullface just looks at them sternly.  Or runs them over in his chariot.

Skullface can often be seen riding in his personal chariot, The Basher.


Oglok The 'orrible:  Another famous orc boss, Oglok has joined Gorfang for this latest Waaagh.  He leads a mob of Orcs called The Reds, known for the red pants, and red banner.

Oglok and The Reds


Boss Skragg: Night Goblin boss of the Crooked Moon Night Goblins, one of Gorfang's leaders. Skragg had been cobbling together a decent sized tribe called the Mad Moons within the Crooked Moon,  scheming and angling for his own horde, but keeps failing.  For now,  the Mad Moons are a key part of Gorfang's Waaagh.

Zom the Third: Zom is Skragg's shaman.  He's the third shaman because the mushrooms that Skragg keeps giving his shamans have proven to be a little too potent and they keep blowing up their heads.  The failure to employ a top quality shaman has been one of biggest drawbacks to Skragg's career.

Blok the Troll: Blok is a stone troll that Skragg keeps trying to lure into battle, but every time he gets into battle he forgets why he's there.

Fred the Giant: Skragg has also convinced Fred, the local giant, to join them as part of Gorfang's Waaagh.  Sometimes, Fred has a great day and gets to bash some heads, eat some elves, and stomp on some 'umies. Other days, Fred falls down. 

When Fred is there with Blok, Blok usually focuses much better and generally attacks whatever Fred does.  

The Slinga':  Skragg swears that this contraption is going to be the thing that puts him over the top and give him his own tribe, then he can finally leave Gorfang's Waaagh and start his own.  The problem is...that it keeps breaking.

The Ball Busta's:  Skragg doesn't seem to realize that his pack of fanatics is really what gives him a fighting chance. But Gorfang did, and that's why he's the Warlord.

Skragg's Mad Moon Tribe:  These mobs form the core of Skragg's Mad Moon Tribe.  Two spearmen mobs and one archer mob.

The Flaggers: These guys are considered the "First" or "Best" mob because they won the brawl to see who got to use the actual flag as their banner.   They always get the best fanatics, and end up with the best stories (whether true or not).
They're led by Bythe the Scythe, and his two henchmen Miiika (holding the flag) and Gonger (guess what he's holding...).

The Mooners: The Second Mob is the Mooners.  Since they're "second mob" they get the worst, most uncontrollable fanatics, or sometimes they don't get any and they act as "bait".   It's a tough life being in "second mob". 

Death Stiks: The mob of archers tries hard, but they always seemed to get shot up by their enemies "better fliyn' stiks" and run away.  So they came up with a new, more menacing name for themselves, the "Death Stiks" - hopefull Gork (or Mork) will give 'em some juice in the next battle. 

Word on the street is that Gorfang has secured the services of an orc bolt thrower and some common gobbos, but we haven't seen them yet...
Update June 21 2020:
We've got some additions to the Waaagh here

Sunday, June 7, 2020

Empire Inventory

I had a bunch of time on my hand during the pandemic so I went through and did an inventory of all my empire stuff, so this is my electronic copy for easy access.


5 Pistoliers
2 crossbowmen
1 Captain (hero model)
3 handgunners
2 champions (or heroes)
1 engineer (more of a 6th edition model)
1 Reiksguard foot knight
1 loose Ice Queen (no horse)
1 new in blister Ice Queen
8 halfling archers
1 hafling hot pot
3 knights of the white wolf
1 mortar with crew
2 empire great cannon with crew
4 kislev winged lancers
2 kislev horse archers
2 outriders
1 mounted amber wizard new in blister
1 mounted grey wizard new in blister
1 mounted celestial wizard new in blister
1 mounted amethyst wizard new in blister
4 light magic acolytes
1 mounted elector count of Hochland new in blister
1 knight of blazing sun
2 Grand Master of Knights Panther (no horse)
1 Ludwig von Schwarzhelm
1 mounted hero / captain of Reiksguard
1 loose Karl Franz
1 mounted knight panther
2 plastic knights (6th ed style, modern ones)
1 blister of modern halberdier commands (for the company of honour)
2 loose standard/musician for greatsword regiment
1 swordsman
1 new in box steam tank
2 new in box Karl Franz with Deathclaw (original box and newer packaging)
1 new empire mounted general (I might sell this thing)
2 Reaper Wizards
12 flagellants
Bunch of loose archers
Lots of Foundry halberdiers
Collection of old Citadel sculpts for a free company militia
1 musician
24 New in box modern empire plastic knights (3 boxes of 8)
5 new modern empire plastic knights (already prepped and based, just never primed them)
 
I think that’s it.

Tuesday, July 16, 2019

Historicon 2019 Part 3

Continuing with the pictures from Historicon 2019.

Next up, a really beautiful western board.  Not sure what rules they were playing but the detail on this board was pretty sweet.


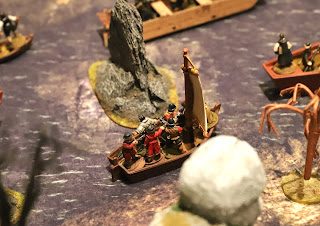
Then there was this pirates board.  Super cool.  I'm not really a big pirates fan, but if i got to play on this board it might change my mind...